Steamed Stuffed Tofu

The gentlest, most soothing, all-protein dish you've ever made!

Cooking Summary
Ingredients: (detailed list)
- Main Ingredients: soft tofu, shrimp, swai fish fillet, green onion, cornstarch, oil
- Filling Marinade: salt, sugar, white pepper, cornstarch, water
- Sauce: fish sauce, oyster sauce, sugar, water, cornstarch
Jump To Section
Overview
This soothing side dish is a classic addition to any homemade Cantonese dinner. The ingredients are easy to digest and the tofu is silky soft, which adds up to a whole lot of love in every single bite!
Why this recipe

Most steamed stuffed tofu recipes online are tested only a handful of times. My dad used to make this dish multiple times a day, every day, for 60+ years and can make this in his sleep.
I know you'll love it as much as our community does! This recipe has over 95.9K views, 1.9K likes on YouTube.
Ingredients
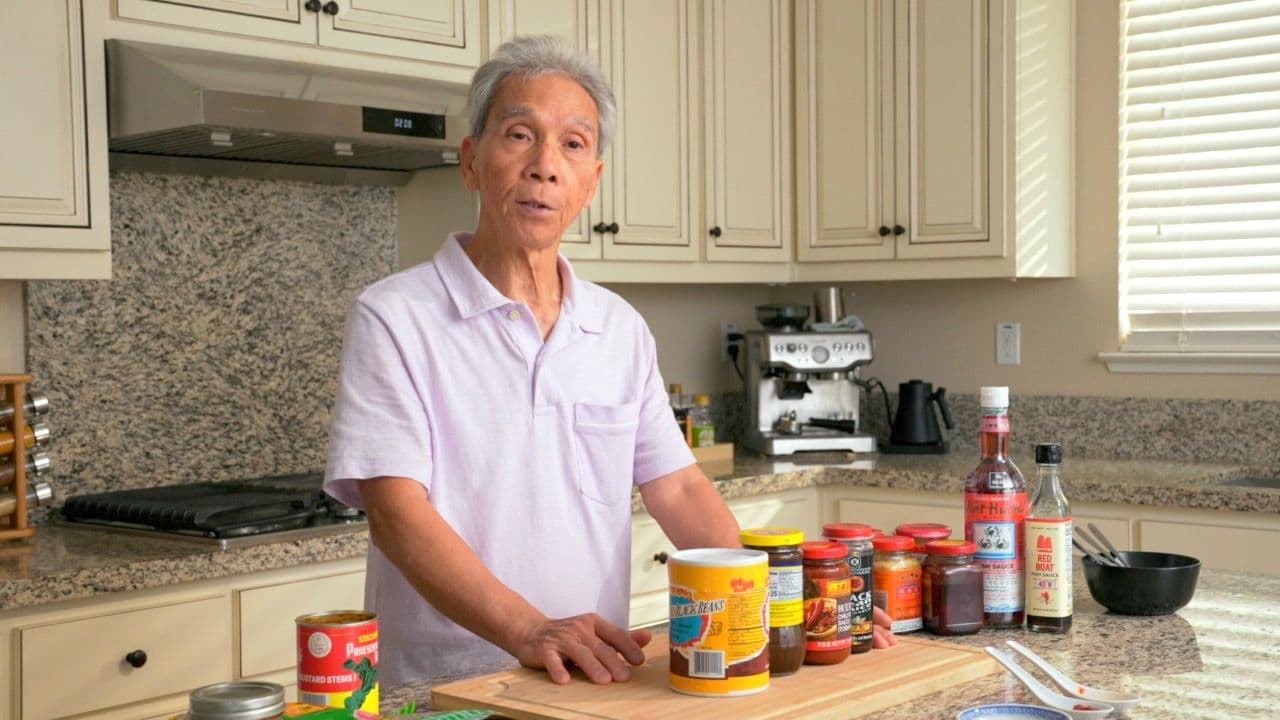
Does size matter?
We specify that we used size 26/30 shrimp in our video, meaning each pound of shrimp of this size will have 26-30 pieces. To prepare our shrimp for the filling, we'll peel, de-vein, and smash it into a paste.
Ultimately, it's more important to get good quality shrimp in the amount that you prefer, and to prepare it nicely. If your shrimp is smaller or larger, that's totally fine and won't change the recipe, as long as you're happy with the quality.
Use what you have access to. That's the true spirit of Chinese cooking!
Soft or firm tofu
Soft tofu's delicate texture is amazingly creamy and light. However, the softer the tofu, the more easily it falls apart with aggressive movements. As much as we love soft tofu, it's not suitable for fried and pan-fried dishes.
Enter the steamer! Since there's no stirring or tossing involved with a simple steamed dish, there's much less risk of damaging a more delicate tofu. The steamer is the perfect home for some happy slabs of soft tofu.
If you prefer more of a bite to your tofu, then use firmer tofu. It's all up to your preferences.
How to make Steamed Stuffed Tofu
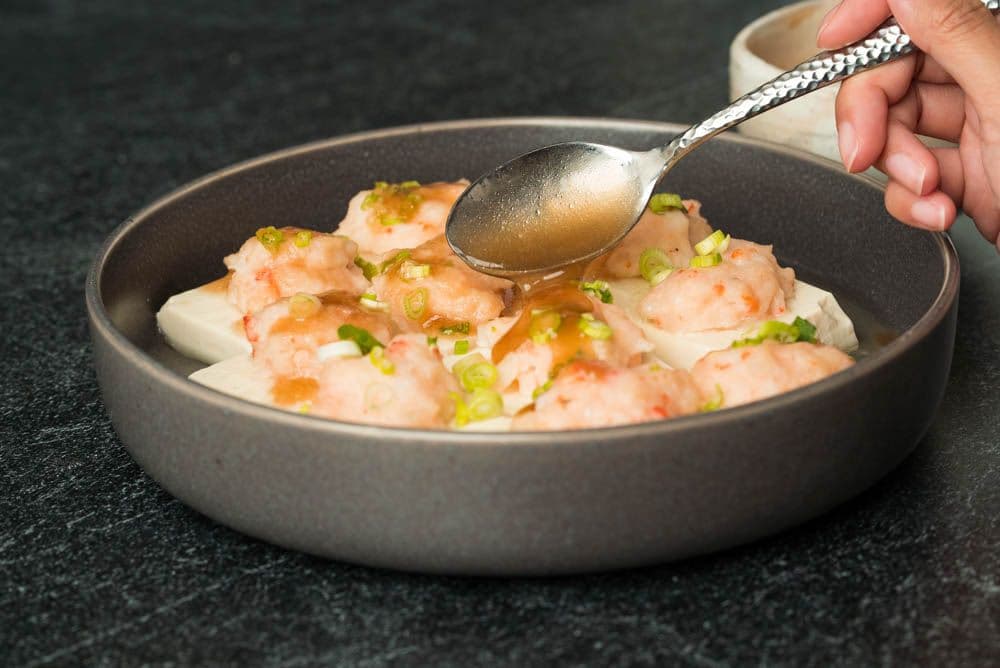
Start by preparing the filling, which will be a fish and shrimp paste. If you wish, you can opt for only fish, only shrimp, or any combination of proteins, like ground pork or beef. While you can sometimes buy this at a Chinese seafood counter, it's good to know how to make it from scratch!
Start by cleaning and peeling the shrimp (10 oz). To peel the shell off, twist and wiggle the tail off. Then, hook a finger under the remaining shell and pull it straight off. If the shrimp is not de-veined already, slide a toothpick or tip of a knife under the dark vein and pull it out.
Give the shrimp a quick wash with clean water to rinse off any debris and shell bits. Squeeze all the water out, and then set it aside.
Prepare the fish fillet (10 oz) by patting it dry with a paper towel. Then, lay it down on your chopping board and cut it into thin slices. Once the fish is all chopped into thin slices, you're going to start smashing it. It's best to use the broadest knife you have for this, the closest thing you have to a cleaver.
Grip your cleaver high on the handle, extend your index finger out to push down on the blade, and turn the cleaver horizontally. Carefully smash the fish slices down into the cutting board. You won't need a lot of sudden, dramatic force, as the fish is delicate and will succumb easily to smashing.
The smashed fish slices should begin to form a paste, and as you go through the fish, gather it back up into new piles to smash again. It should get stickier and more paste-like with the second pass.
Then, return to a normal knife-holding position and give the fish paste a thorough chop. This will severe any remaining long strands of connective tissue and ensure that the fish paste is nice and soft.
Next, start making the shrimp paste. There's no need to slice it first, so proceed directly to smashing. After smashing the shrimp, then chop it thoroughly. Gather the forming shrimp paste together and smash it further to get the paste even finer and stickier.
Next, mix the fish and shrimp pastes together. Fold them together, then give this mixed paste another thorough smashing.
Now that we have the shrimp and fish paste, we can finally marinate it. Add salt (1 tsp), sugar (1 tsp), white pepper (½ tsp), cornstarch (2 tbsp), and water (2 tbsp) to a bowl. Mix it up and pour it over the shrimp and fish paste.
Mix it very, very thoroughly until the paste has absorbed the marinade and become a sticky paste. The more you mix it, the bouncier and chewier your paste will be when you cook it!
Put the shrimp and fish paste into the refrigerator to chill while you prepare the tofu in the next step.
Remove the tofu (1 package) from its packaging and pour out the water.
When we cut the tofu, we’ll want to end up with short squares that the filling can perch safely on top of. Keep that final shape in mind as you make these cuts. When you lay the tofu block down on the cutting board, all of the cuts will start from the top and cut down.
Cut the tofu in half down the middle. Then, make four cuts perpendicular to that cut, resulting in ten squares of tofu. Lay the tofu squares down on the dish that you’ll be steaming in.
When choosing your steaming dish, make sure that it's heat-resistant. Ceramic, glass, and stainless steel are all fantastic choices. Avoid plastic to be safe, and certainly don't steam disposable dinnerware like paper or Styrofoam!
Use a paper towel to pat them dry. Sprinkle a bit of salt over them to season (not too much, as salt tends to draw water out of ingredients, which will create bigger puddles of liquid on your plate). Sprinkle some cornstarch over each piece of tofu as well, to help the filling adhere better.
While you have the cutting board out, chop the green onions (2 stalk). They'll go on last for a final garnish.
Take your filling out of the fridge. Gently scoop about 1 tbsp of filling onto each tofu square. You can press down gently to shape the filling and encourage it to stick.
Coat the tops of each stuffed tofu with a little bit of oil (1 tsp) for extra shine and silkiness. You can either drizzle the oil or if you have a brush, you can also try brushing the oil on.
(Now’s a good time to start getting some water boiling so it’ll be ready for steaming later!)
In a bowl, mix together fish sauce (1 tbsp), oyster sauce (1 tbsp), sugar (1 tsp), water (4 tbsp), and cornstarch (1 tsp). Later, you’ll be able to adjust the viscosity as you cook it.
If you have a dedicated steamer, that’s perfect for this step. We usually set up our wok with a steamer rack. To do that, set the steamer rack in the wok and add water. To save time, use already hot or boiling water.
Set the heat to high and cover the wok with a lid to help the water heat up quickly. Once the water is boiling, uncover the wok and set the dish with the stuffed tofu onto the steamer rack.
Cover with the lid and cook for 8-10 minutes, until the filling is firm. Another indicator that the filling is cooked through is to check for the shrimp’s cooked, orange color.
Take the stuffed tofu out and garnish with chopped green onion.
Pour the steaming water out, or use a new, clean wok. Set the heat to high and pour the sauce in. Add a dash of oil and stir the sauce as it cooks. Turn the heat down to medium as it begins to boil.
Here, you can adjust the viscosity of the sauce. If it’s too thick, add more water, a tbsp at a time. If it’s too thin, mix up some more cornstarch and cool water to make a thickening slurry, and add that as you stir.
When the texture of the sauce is to your liking, add a bit more oil for a glossy finish. You can either pour the sauce into a bowl, or pour it directly over the stuffed tofu. Enjoy!
Top 3 Mistakes
- Skipping the starch dusting:
Dry the tofu and lightly dust its surface with cornstarch before pressing on the filling. That preparation helps the paste bind instead of sliding off the smooth tofu during handling.
- Leaving ingredients too wet:
Drain and dry the ingredients as directed before they reach the pan. Extra water changes how they cook, making it harder to get the browning and texture the recipe calls for.
- Starting with cold steam:
Bring the steaming water to the state specified before adding the dish. Starting too early changes the cooking time, so establish the steam before you begin counting minutes.
Frequently Asked Questions
What kind of tofu should I use to make steamed stuffed tofu?
Because the tofu will be steamed, you won’t be agitating or manipulating it very much during the cooking process. That means you can opt for a softer tofu without worrying about it falling apart. If you prefer firmer tofu, you can also use that!
How do you make the filling stick to the tofu?
You can encourage the filling to stick to the stuffed tofu as you prepare the ingredients. Make sure the tofu is dry. Filling will slide right off of a wet piece of tofu. A light sprinkle of cornstarch will also help bind the filling to the tofu. Finally, you can gently press the filling into the tofu as you’re putting it on.
Do I have to make fish paste from scratch?
Nope! You can definitely buy premade fish and/or shrimp paste from your local Asian grocery store, if it's available.
A nice middle ground might be to buy the fish and shrimp whole, prep them as we show you in the recipe, but use a food processor instead of smashing the filling into paste by hand. You can get a really beautiful paste using a food processor! Old school is a vibe, not a requirement.
How long do I steam tofu for, and how do I know if the filling is cooked through?
Tofu steams very quickly, so you just need to worry about fully cooking the filling. With our shrimp and fish paste, there are two key indicators to look for.
First, check the texture. If it has become firm, then it’s cooked through. If it is still soft and paste-like, then it still needs to be cooked for longer.
Second, check the color. Shrimp turns orange when it cooks, so watch for that orange color. For different ratios of shrimp to fish or pork, you may have a brighter or paler shade of orange.
What types of dishes are safe to steam in?
When choosing your steaming dish, make sure that it's heat-resistant. Ceramic, glass, and stainless steel are all fantastic choices.
Otherwise, we'd recommend erring on the side of caution: avoid plastic dishes, and certainly don't steam disposable dinnerware like paper or Styrofoam!
Pairs well with
View all →

Made with love ❤️
We started Made With Lau to celebrate Cantonese culture and honor the legacy of our wonderful parents, Jenny and Chung Sun Lau.
Our hope is that these recipes and stories help you spread the joy, love, and nostalgia that I felt growing up.