Moo Shu Pork (木须肉)

A Cantonese homestyle version of this favorite from Northern China!

flodesk gif
Prep Time
15 min
Total Time
30 min
Yields
4 servings

A Recipe by Daddy Lau

My dad's been cooking Chinese food for over 50 years - as a kid fending for himself in Guangzhou, as the head chef of his own restaurant, and as a loving father in our home.

Hopefully, by learning this recipe, you'll get to experience some of the delicious joy we felt growing up eating his food!

- Randy

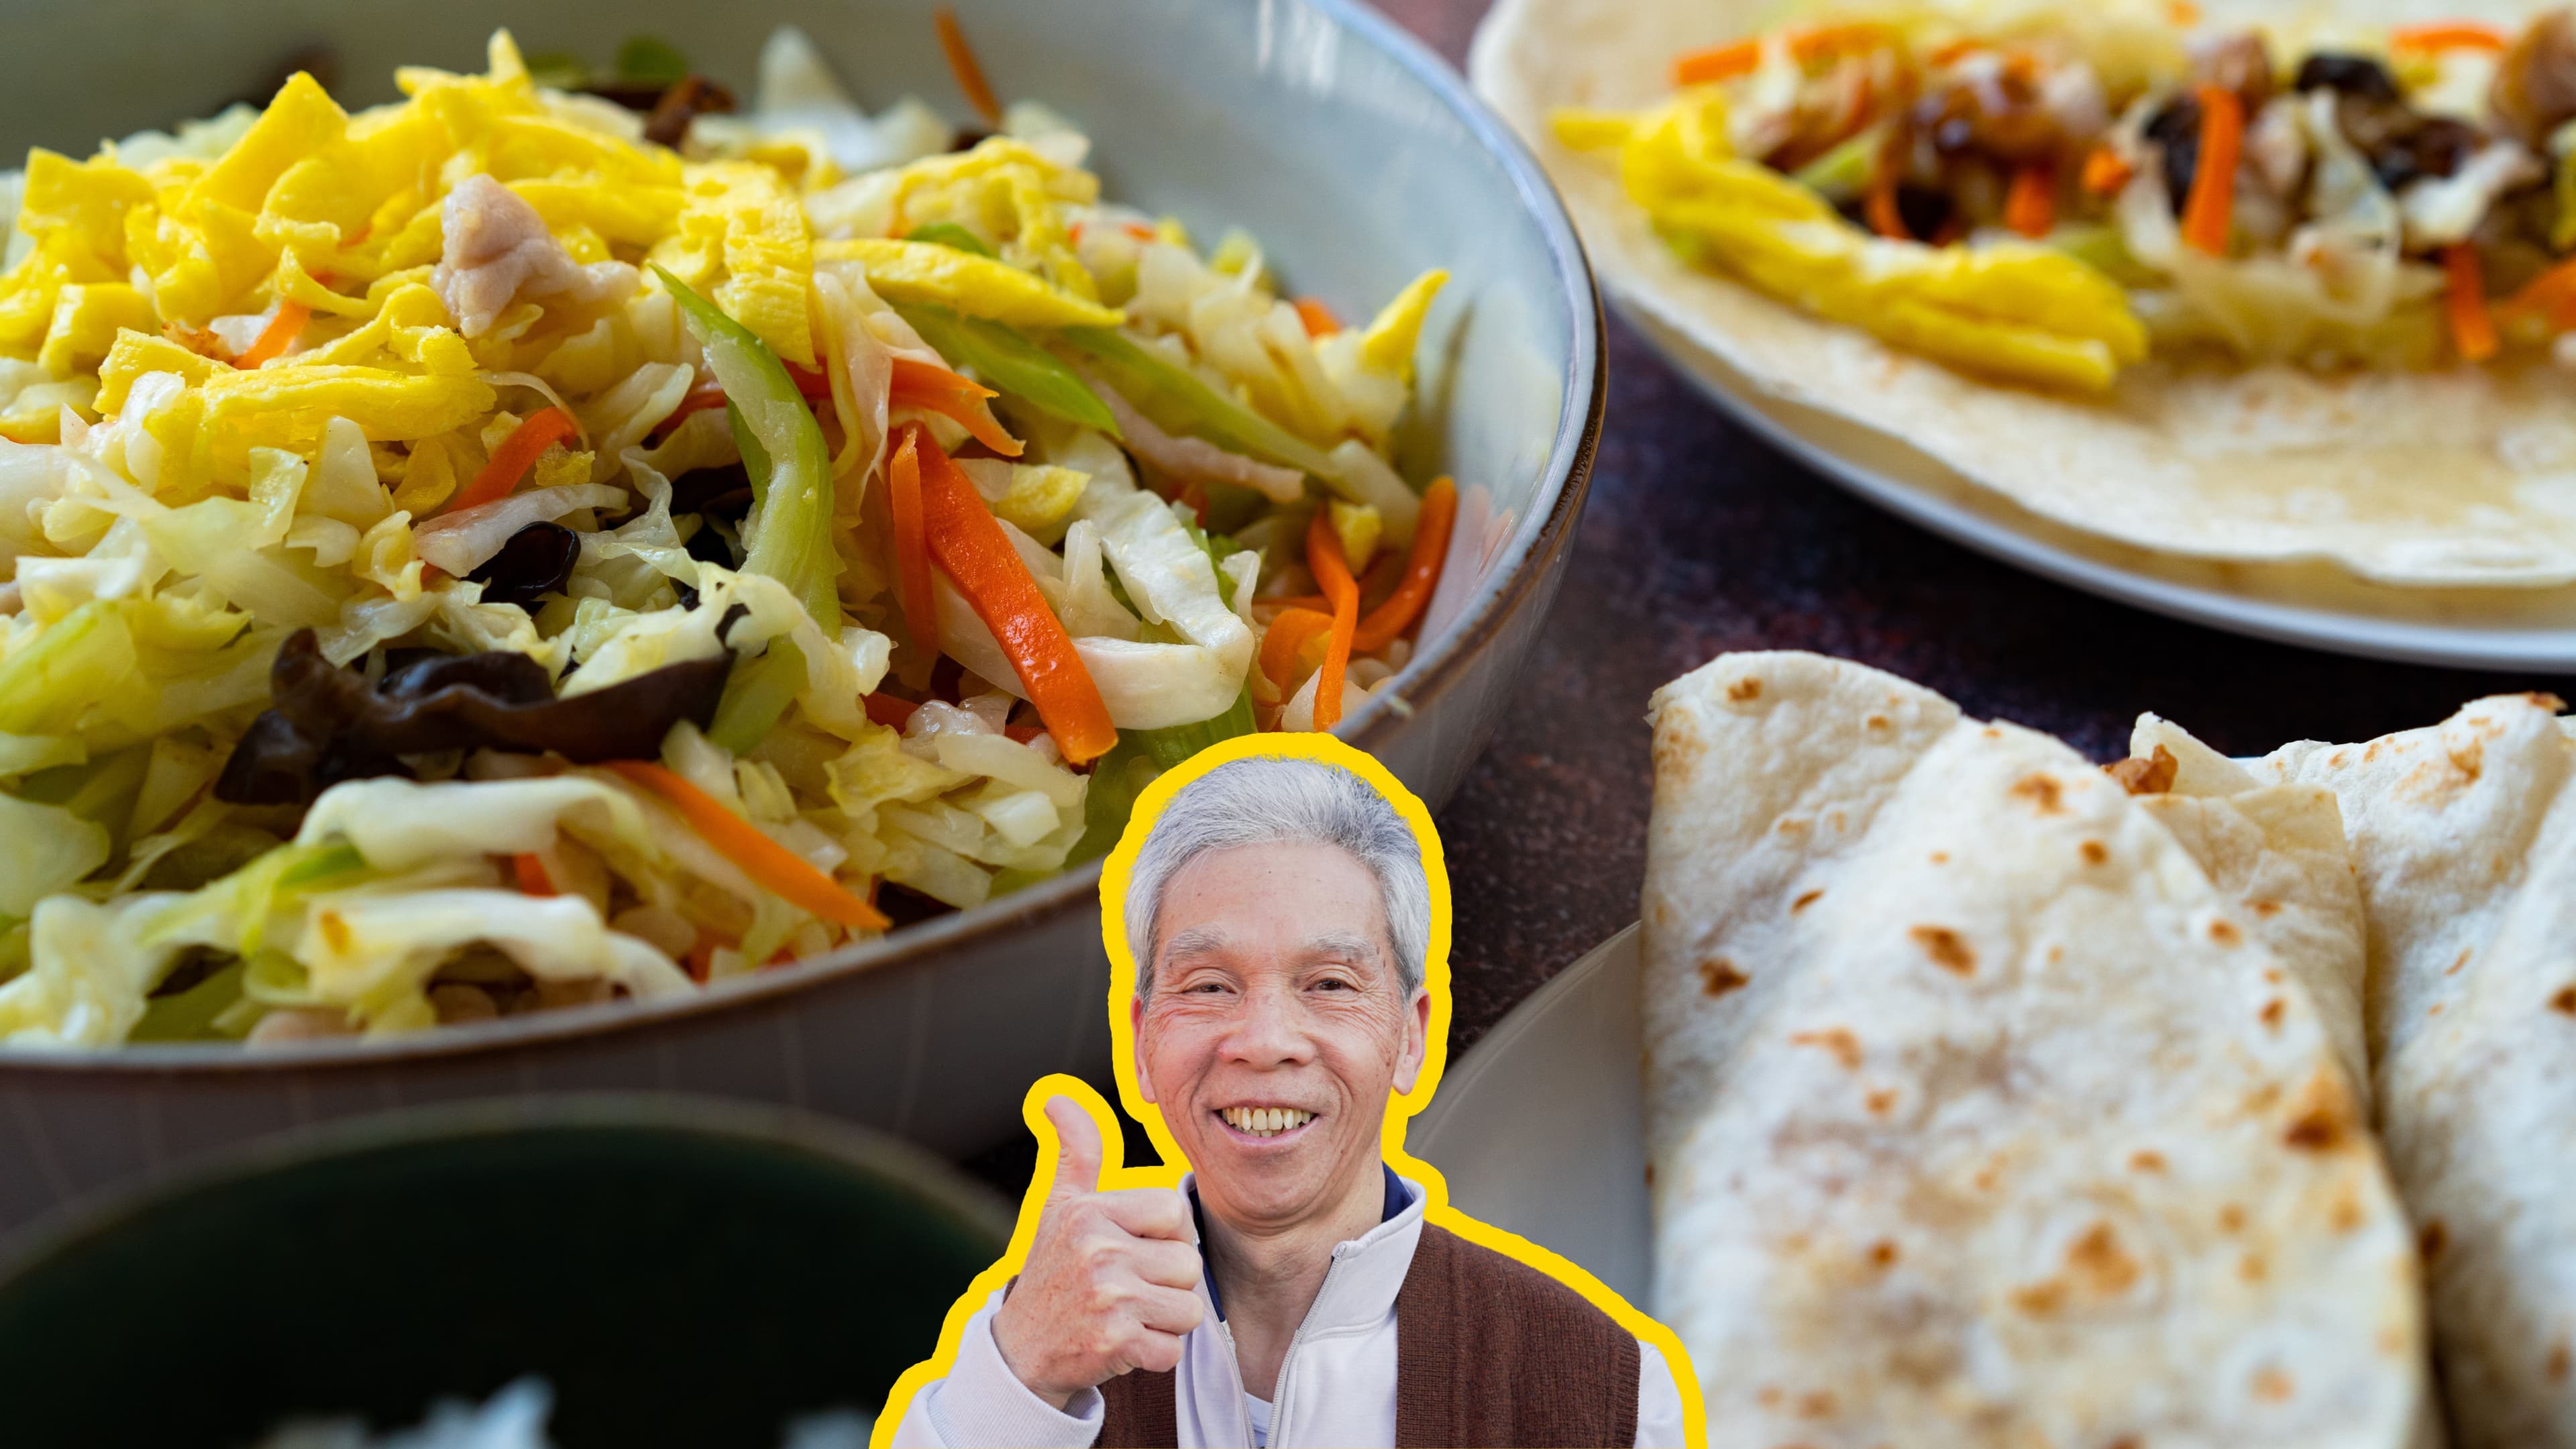
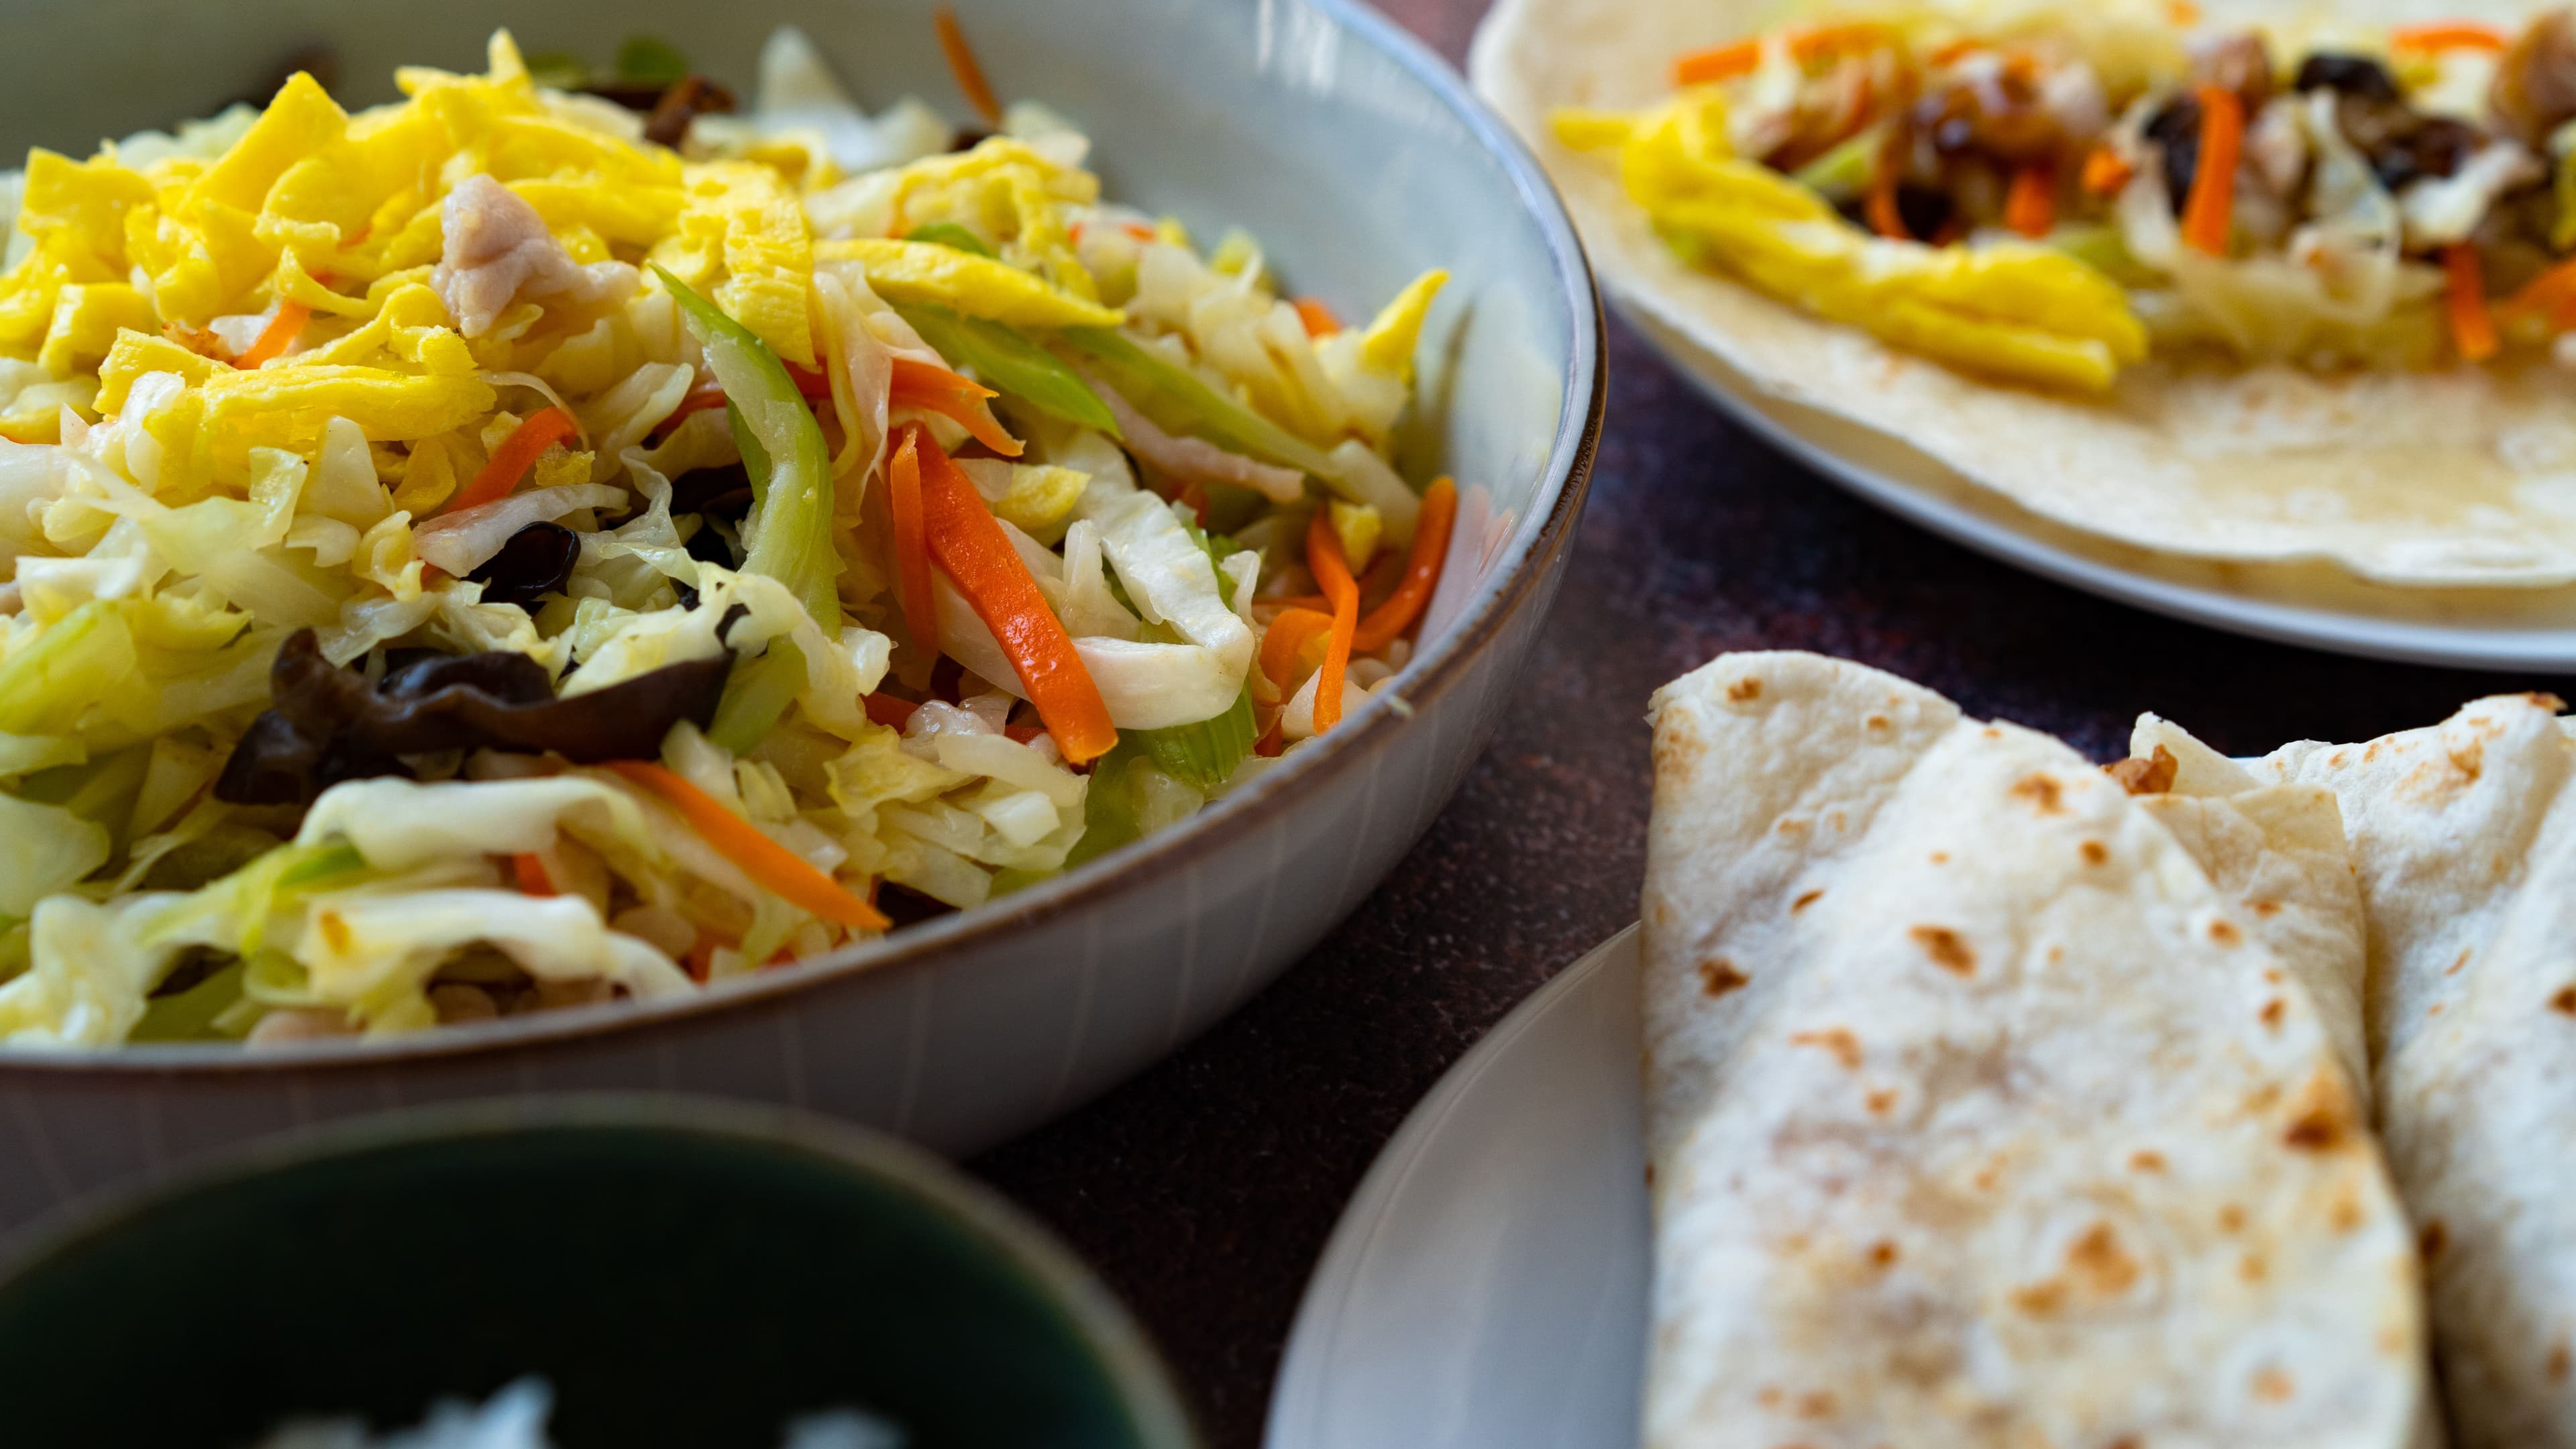
Moo Shu Pork is a quick and healthy dish that was a popular appetizer at my dad’s old restaurant.

The Story of Moo Shu Pork

Traditionally, Moo Shu Pork belongs to Northern Chinese cuisine. By some accounts, the recipe first appeared in Shandong Province, where it then grew in popularity and evolved as it spread to Beijing, the rest of China, and to Western countries.

It was originally called Moo Shi Pork (or “muhk sāi” in Cantonese), named after the famous Sweet Osmanthus tree, which produces beautiful blossoms of "gwai fā" (桂花), a Chinese symbol of nobility, status, love, and peace.

China even named a city in the tree’s honor, Guilin, which literally means ”Forest of Sweet Osmanthus”, and which also happens to be where my parents went for their honeymoon in the 80s.

After the dish spread to American Chinese restaurants in the 1960s, somewhere along the way, we started calling it Mu Shu Pork (“muhk sēui” in Cantonese). This is a nod to some of its core ingredients - wood ear fungus (“muhk yih”) and scrambled eggs, which resemble the white and yellow blossoms of the Osmanthus tree.

Check out a quick story summary of our recipe!

Ingredients

Weight: US
oz
g
Volume: US
cup
mL
Servings
4

Main Ingredients

  • 1 oz rehydrated wood ear fungus
  • 8 oz cabbage
  • 2 oz lean pork
  • 2 oz carrot
  • 2 oz celery
  • 2 egg
  • 8 flour tortillas

Flavors + Marinades

  • salt (

    for mixing eggs, amount: to taste

    )
  • 1.5 tsp cornstarch
  • 0.50 tsp water
  • 0.25 tsp salt (

    for pork marinade

    )
  • hoisin sauce (

    enough to spread on tortillas

    )
  • 2 tbsp canola oil
  • 0.50 tsp chicken bouillon
  • 1 tbsp oyster sauce

Tortillas in a Chinese dish?!

The first question my wife and I had when my dad started cooking was, "why are we using tortillas?"

The traditional form of Moo Shu Pork was eaten with a much thinner flour wrap (or you'd skip the wrap entirely.) In Cantonese, it's called a "bohk béng" - or "thin pancake". Others call it a Spring Pancake.

My parents touch on this during our "Meal Time" discussion, but at a certain point, at least for American Chinese restaurants, chefs started switching to Mexican tortillas because they were much cheaper, readily available, and just as tasty.

Moo Shu Pork's Core Ingredients

There are a lot of variations on Moo Shu Pork, but the core ingredients tend to be wood ear fungus, scrambled eggs, and some sort of flour tortilla.

In other recipes, you'll commonly find bamboo shoots, dried lily flowers, and other ingredients. My dad prefers to keep things a bit simpler, so he opted to go without those for this recipe.

We expand on this more later, but if you don't live near an Asian market, here are some options on Amazon to buy Dried Wood Ear Fungus. There's a few options, depending on what's in stock:

It's all about the Hoisin Sauce

Much of the sweet and savory flavor profile of my dad's recipe comes from Hoisin sauce. Sometimes these can be hit or miss, so I've linked to the one that my dad uses.

Finding Asian Ingredients

Some of these ingredients are hard to find in a typical grocery store.

If you don't live near an Asian market, most or all of what my dad uses in this recipe can be found on Amazon.

I've also included some other Chinese kitchen essentials, used in many of my dad's other recipes.

These links are affiliate links, which means that if you use our links to purchase these ingredients, Amazon pays my family a small amount for the sale - at no extra cost to you. If you use these links, we really appreciate the support!

The first step is to give those dried wood ear fungi some life! Submerge the wood ear fungus (1 oz) in a bowl of water for 5-15 minutes.

If you're in a rush, you can use warm water. Microwave water for about 45-60 seconds, and submerge the wood ear fungus in the warmed water. The rehydration process should take about 4-5 minutes.

Now, we'll cut our lean pork (2 oz) into thin slices, and then into thin strips.

Place the pork into a bowl off to one side, and add cornstarch (1.5 tsp), water (0.50 tsp), and salt (0.25 tsp). Using your finger, mix it into an even slurry. Then, mix and massage the cornstarch slurry and pork with your hands for about 20-30 seconds.

Coating the pork with cornstarch helps keep it tender and juicy when we cook it.
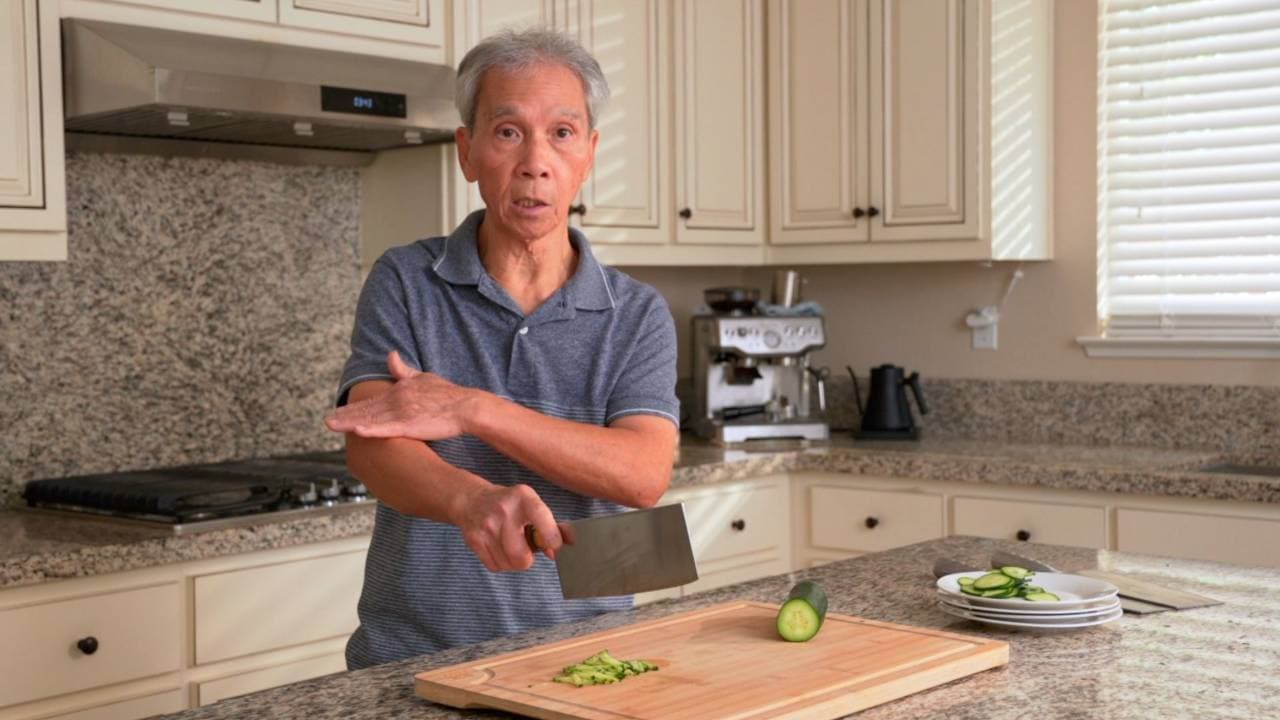
As we did with the pork, we'll be cutting our cabbage (8 oz), celery (2 oz), and carrots (2 oz) into thin slices, and then into thin strips.

When the wood ear fungus is rehydrated (it should feel more like a jelly fish), we'll also cut that into small strips.

Crack your eggs (2 ) into a bowl and add a little bit of salt ( ) (to taste). Beat with your fork until bubbles form.
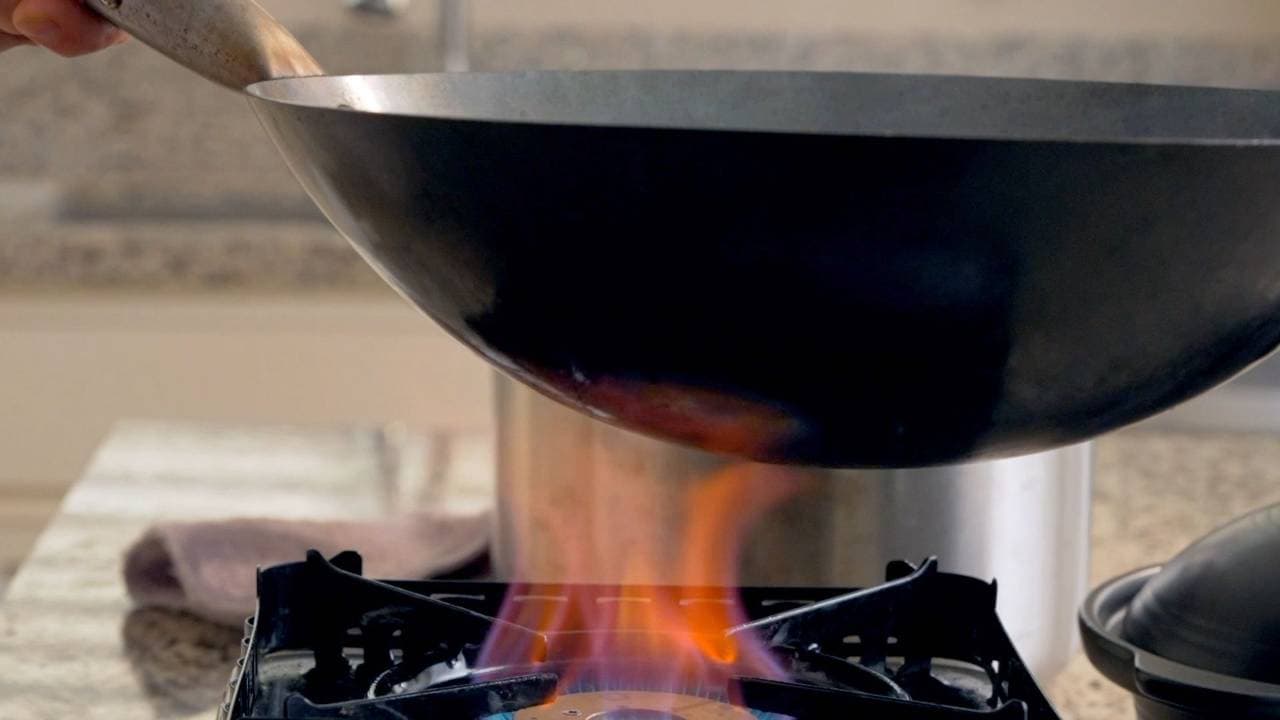
As with most Chinese recipes, we need our wok to be really hot before cooking. Set the stove to high heat and heat the wok for 3-5 minutes. When it's ready, it should just be starting to let off a little bit of steam/smoke.

Add canola oil (1 tbsp), and spread it around the surface of the wok. Mix your eggs for good measure, and slowly pour it into the wok, covering as much surface area as you can as you pour.

We'll cook the eggs for 2-3 minutes in total, and we're aiming for a soft, omelette-like consistency. Occasionally lift the wok from the heat, and tilt the wok around to spread the egg around.

Halfway through, using your spatula, carefully separate the egg from the wok, and flip. Cook for another minute, and then set the egg aside on a plate.

Add more canola oil (1 tbsp) to the wok, and wait about 1-2 minutes for the wok to heat up again.

Then, add the pork to the wok, constantly moving and stirring the pork. The pork will turn white when it's cooked through, and that's when you can set the pork aside.

Since there's already oil in the wok, we don't need to add any more oil.

Pour all of our vegetables into the wok and cook for about 8-10 minutes. We don't need to be "fast-handed" as my dad says - be gentle as you stir and move the vegetables around to be cooked evenly.

Important

Don't overcook the vegetables, otherwise we'll lose the all-important crunch factor, and the vegetables will release too much water.

We're aiming to cook at higher heat for a shorter amount of time.

Since a lot of the taste comes from hoisin sauce ( ), we don't need to add too much flavoring to the vegetables themselves.

About 4-5 minutes in, add chicken bouillon (0.50 tsp) and oyster sauce (1 tbsp) to the wok, and stir. Shortly after, add the pork back into the wok, and mix everything together.

Once the vegetables + pork are ready, plate them.

Almost there! We just need to cut our eggs into slices, and warm up our tortillas.

To warm the tortillas (8 ), you can either throw them on a wok or pan for 60-90 seconds, or microwave them for 30 seconds. Both methods work fine, but heating them via stovetop is slightly tastier.

When you're ready to eat, using a knife, lather the tortillas with Hoisin sauce, and load up the tortilla with the vegetables and pork.

Enjoy!

FAQ

What is in Moo Shu Pork?

  • We use wood ear fungus, green cabbage, carrot, celery, egg, and lean pork. You can include or omit whatever ingredients you like, as long as they are chopped into thin strips.

What is the wrapper for Moo Shu Pork?

  • We like to use tortillas because they're affordable and accessible. Lots of restaurants opt for tortillas too!
  • The traditional wrapper is a thinner flour-based wrapper which is not as available in stores, and takes a bit more work to make at home.

What is the sauce that comes with Moo Shu Pork?

  • The sweet, slightly savory brown sauce that's served with Moo Shu Pork is hoisin sauce! The same sauce is served with Peking Duck, and it's often used as a marinade as well as a dipping sauce. The key ingredient is fermented soybean paste and some of the common components are sugar, vinegar, garlic, red chili peppers, five-spice powder, sesame and starch.
  • You can find it at most grocery stores now, but if you don't see it locally, you can get it online as well. This is the one my dad uses: Koon Chun Hoisin Sauce

How do you eat Moo Shu Pork?

  • Grab a wrapper, slather on some delicious hoisin sauce, and fill it with the chopped, stir-fried filling. You can fold it like a taco or, if your wrapper is big enough, you can roll it like a burrito. No matter how you decide to shape it, it's going to be delicious!
  • Since it's considered an appetizer, restaurants might only provide one or two wrappers per serving, so you don't get too full for the main course. The remaining filling stays on the table as a side dish to eat with rice. At home, though, you can totally go nuts and use all the wrappers you can find!

Is Moo Shu Pork healthy?

  • Yes, it is! It's full of great, nutritious vegetables. You can make sure that you make the healthiest version possible by choosing good quality produce. Our recipe already has very little salt and chicken bouillon, and you can always reduce them further or omit them if necessary, though the Moo Shu Pork may come out less flavorful.
  • If you're looking to reduce your carbs, this is a perfect dish because vegetables make up the bulk of the volume. You can also control your own portion of tortilla, or skip the tortilla and eat the delicious filling with something else.
  • Restaurant or instant versions may not be as healthy when they include additives and preservatives, but because you're making the dish from scratch, you have full control over the ingredients.

Summary

Moo Shu Pork (木须肉)
A Cantonese homestyle version of this favorite from Northern China!
  • Prep Time: 15 min
  • Total Time: 30 min
  • Yield: 4 servings

Main Ingredients

  • 1 oz rehydrated wood ear fungus
  • 8 oz cabbage
  • 2 oz lean pork
  • 2 oz carrot
  • 2 oz celery
  • 2 egg
  • 8 flour tortillas

Flavors + Marinades

  • salt (

    for mixing eggs, amount: to taste

    )
  • 1.5 tsp cornstarch
  • 0.50 tsp water
  • 0.25 tsp salt (

    for pork marinade

    )
  • hoisin sauce (

    enough to spread on tortillas

    )
  • 2 tbsp canola oil
  • 0.50 tsp chicken bouillon
  • 1 tbsp oyster sauce

Step 1 - Rehydrate wood ear fungus

↑ Jump to details

Submerge the wood ear fungus (1 oz) in a bowl of water for 5-15 minutes.

If you're in a rush, you can use warm water. Microwave water for about 45-60 seconds, and submerge the wood ear fungus in the warmed water. The rehydration process should take about 4-5 minutes.

Step 2 - Prepare pork

↑ Jump to details

Cut the lean pork (2 oz) into thin slices, and then into thin strips.

Place the pork into a bowl off to one side, and add cornstarch (1.5 tsp), water (0.50 tsp), and salt (0.25 tsp). Using your finger, mix it into an even slurry. Then, mix and massage the cornstarch slurry and pork with your hands for about 20-30 seconds.

Step 3 - Cut vegetables

↑ Jump to details

Cut the cabbage (8 oz), celery (2 oz), and carrots (2 oz) into thin slices, and then into thin strips.

When the wood ear fungus is rehydrated, cut that into small strips.

Step 4 - Prepare eggs

↑ Jump to details

Crack your eggs (2 ) into a bowl and add a little bit of salt ( ) (to taste). Beat with a fork until bubbles form.

Step 5 - Heat wok, cook eggs

↑ Jump to details

Set the stove to high heat and heat the wok for 3-5 minutes. When it's ready, it should just be starting to let off a little bit of steam/smoke.

Add canola oil (1 tbsp), and spread it around the surface of the wok. Mix your eggs for good measure, and slowly pour it into the wok, covering as much surface area as you can as you pour.

Cook the eggs for 2-3 minutes in total, aiming for a soft, omelette-like consistency. Occasionally lift the wok from the heat, and tilt the wok around to spread the egg around.

Halfway through, using a spatula, carefully separate the egg from the wok, and flip. Cook for another minute, and then set the egg aside on a plate.

Step 6 - Reheat wok, add oil, cook pork

↑ Jump to details

Add more canola oil (1 tbsp) to the wok, and wait about 1-2 minutes for the wok to heat up again.

Then, add the pork to the wok, constantly moving and stirring the pork. The pork will turn white when it's cooked through, and that's when you can set the pork aside.

Step 7 - Cook vegetables

↑ Jump to details

Pour all of the vegetables into the wok and cook for about 8-10 minutes. We don't need to be "fast-handed" as my dad says - be gentle as you stir and move the vegetables around to be cooked evenly.

Important Note

Don't overcook the vegetables, otherwise you'll lose the all-important crunch factor, and the vegetables will release too much water.

This stage of cooking is at a higher heat for a shorter amount of time.

Step 8 - Add flavors, pork

↑ Jump to details

Since a lot of the taste comes from hoisin sauce ( ), we don't need to add too much flavoring to the vegetables themselves.

About 4-5 minutes in, add chicken bouillon (0.50 tsp) and oyster sauce (1 tbsp) to the wok, and stir. Shortly after, add the pork back into the wok, and mix everything together.

Once the vegetables + pork are ready, plate them.

Step 9 - 
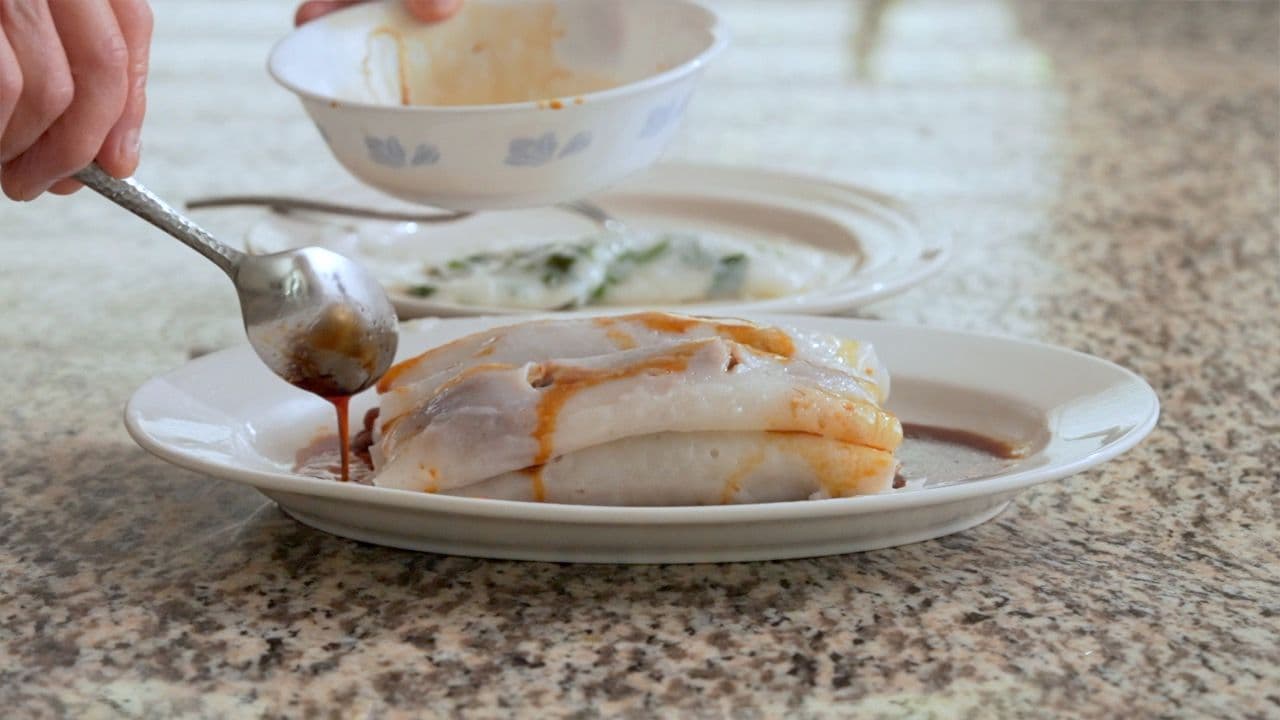
Prepare the Moo Shu Pork wraps

↑ Jump to details

Cut the eggs into slices, and warm up the tortillas.

To warm the tortillas (8 ), you can either throw them on a wok or pan for 60-90 seconds, or microwave them for 30 seconds. Both methods work fine, but heating them via stovetop is slightly tastier.

When you're ready to eat, using a knife, lather the tortillas with Hoisin sauce, and load up the tortilla with the vegetables and pork.

Enjoy!

Step 10 - Take pictures
Whip out your camera (1). Begin taking photos (1,000,000). Pick your favorites!
Step 11 - Share and tag us on Instagram @madewithlau #madewithlau!
Did you have fun making this recipe? We'd love to see & hear about it. (Especially my dad. He would be THRILLED!)

Enjoy!

This was one of the most popular dishes at my parents' old restaurant!

Now, hopefully, you can create your own memories with this dish with your loved ones.

Also, I cordially invite you to eat with us and learn more about the dish, Chinese culture, and hang out with our adorable son.

Cheers, and thanks for cooking with us!

Feel free to comment below if you have any questions about the recipe.